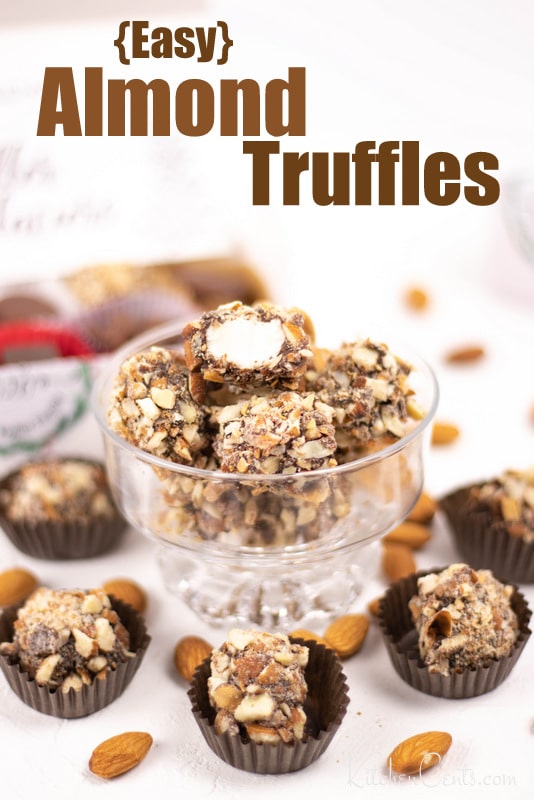
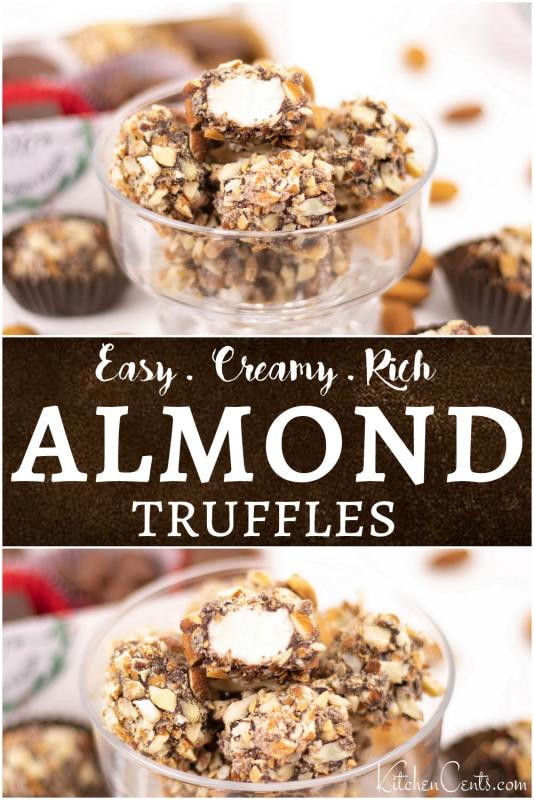
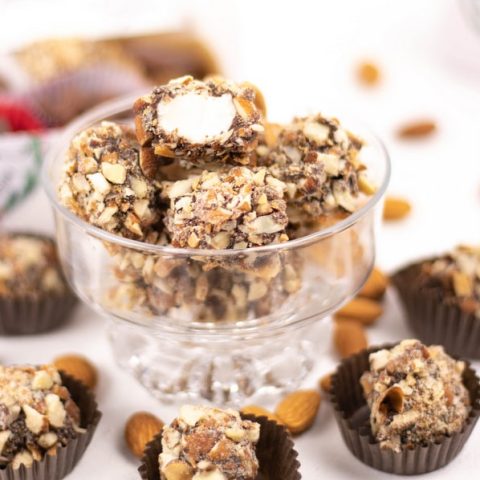
Learn how to make delicious, rich almond truffles right at home. Delicious truffles filled with smooth cream centers and rolled in almonds.
This post may contain affiliate links. If you click on a link and make a purchase, I may receive a small commission at no extra cost to you.
Almond Truffles are 100% scrumptious! Like “Willy Wonka and the Chocolate Factory” scrumptious!
These rich truffles might be small but they pack all the deliciousness you are looking for in a truffle.
Check out this video to see how easy these chocolate almond truffles are to make at home…
Smooth, creamy butter-flavored center, crisp chocolate, and toasted almond to top them off. These are one of my all-time favorite chocolates to make around the holidays because this recipe is quick, makes a lot, and is divine.
But who am I kidding, you don’t need the holidays to enjoy these almond truffles! This sweet candy treat would be great for Thanksgiving, Christmas, New Years’, Valentine’s, my birthday, your birthday, and even our very-unbirthdays! *wink*
If you like these Almond Truffles, I think you’ll really enjoy these other recipes too:
- Soft Caramels
- Peanut Brittle
- English Toffee
- Peppermint Bark
- Peanut Butter Cups (they taste like mini Reese’s peanut butter cups)
- Black Anise Caramels
- Glazed Pecans
- Vanilla Oreo Truffles
- Easy Tiger Butter Bark
- White Chocolate Peanut Butter Cups
- Easy Andes Mint Fudge
INGREDIENTS YOU’LL NEED:
- Sugar
- Cream
- Corn syrup
- Butter flavoring
- Chocolate
- Toasted almonds
The fondant centers only have 3 ingredients plus the flavoring. They are really easy to make too.
HOW DO I MAKE ALMOND TRUFFLES?
MAKE THE FONDANT CENTERS:
To make almond truffles, start by making the creamy fondant centers.
In a large heavy saucepan, add the cream and sugar.
PRO TIP #1: Use a very heavy-bottomed thick pot.
A 4-5 quart pressure cooker is great for this with its extremely solid, thick sided and bottom. Using a heavy, thick-bottomed pot helps distribute the heat more evenly. My dad found me and my sisters each an old pressure cooker years ago at secondhand stores.
Let the sugar and cream soak together for a few minutes before heating.

Next, bring the sugar mixture to a slow boil over medium to medium-high heat, then add the corn syrup.

USE A CALIBRATED CANDY THERMOMETER!
Using a calibrated candy thermometer (see the bottom of this post for more information on how to calibrate your thermometer), cook the cream center mixture until it reaches 238 degrees Fahrenheit. Make sure to stir constantly and continue washing down the sides to avoid sugar crystals.
PRO TIP #2: Have a pastry basting brush and a cup of water ready.
Use the brush and water to wash the sides of the pot as sugar crystals can splash up on the sides. If left undissolved, the sugar grains can cause the entire mixture to crystallize in the final stages. To avoid this from happening, wash the sides of the pot several times throughout the cooking process.
Stir constantly to avoid burning or scorching.
Cook the sugar mixure to 238°F. Remove from heat and pour onto a cool, damp marble slab, cookie sheet or into a chilled mixing bowl.
PRO TIP #3: DON’T scrape the sides of the pot when pouring!
Avoid touching or scraping the sides of the pot during or after pouring. Doing so can cause sugar crystals to form, which will ruin the smooth texture of your final candy center.

The sugar mixture will be extremely hot. To avoid any unnecessary breakage, do not pour the hot mixture into a glass bowl or baking dish as it would most likely shatter.
The mixture will be a creamy opaque color and resemble a thick syrup.
Once the mixture has been poured to cool, place 1 tablespoon of butter into the center of the batch. Let it cool slightly, about 5 to 10 minutes.

Next, using a wooden spatula/spoon or electric fitted with a bread hook attachment beat the mixture (medium speed if using an electric mixture). It can take a while for the mixture to turn into the thick yet pliable fondant we love.
As the mixture is turned and beated, it will go from a runny slight-opaque thick syrup to a creamy-white firm dough.
You may notice that as the chemical reaction occurs and the fondant begins to turn, it will put off a heavenly, sweet cream aroma. Once that happens, it’s almost done. If the batch becomes stiff very quickly, this is normal.
PRO TIP #4: It is normal for the mixture to turn crumbly and firm.
Keep mixing or kneading until it turns to a pliable creamy white dough.
Let the fondant rest for at least 24 hours. This helps any sugar soften and the fondant to fully cool. As it cools it will become more firm.

When it’s time to make the centers, knead the rested fondant a few times then add the butter flavoring.
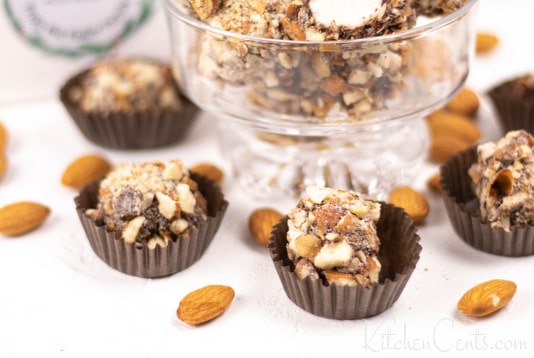
These almond truffles come together very quickly. I love that the fondant centers don’t have to be perfect because they will be dipped in chocolate and covered with chopped toasted almonds.
When rolling the fondant keep in mind that the final truffle will be much larger than the size of the center when finished. I would suggest not going any larger than a 1/2 tablespoon. I like to use a 1/2 tablespoon portion scoop to make the truffles more consistent. You can find one similar to what I use HERE.
If using a 1/2 tablespoon scoop the final almond truffles will be about the size of a quarter, perfect two-bite chocolate.
If too soft or sticky to form in balls, chill the fondant for 30-60 minutes before rolling.
PRO TIP #5: Chill the rolled centers before dipping.
This will help the chocolate chill and set more quickly. When the chocolate sets more quickly it will help the almonds set and keep your workspace cleaner. Otherwise, you may find some almonds will fall off as you move them to your cooling station (a clean pan or cookie sheet).

Once chilled dip the fondant centers into melted chocolate. Tap off the excess chocolate to prevent chocolate nut clusters and help keep a solid ball form.

Next, place the chocolate-dipped center into the bowl of toasted chopped almonds. Gently cover the chocolate-coated center with nuts.
PRO TIP #6: Let the newly nut-coated almond truffle hang out at the side of the nut bowl to allow the chocolate to begin to set.
This will help keep the truffle round and minimize losing nuts on transport to the next cookie sheet.

Once the chocolate is stiff enough to pick up, place the fresh almond truffle on a cookie sheet lined with parchment or waxed paper until fully set.
This recipe will make about 150 truffles if the butter center is about the size of a measuring teaspoon. If using a 1/2 tablespoon scoop, this recipe will yield about 100 truffles.
It seems like a lot of truffles, right? I’m tellin’ ya, they’ll go fast.
NOT SURE YOU WANT 100 ALMOND TRUFFLES?
If you only want a half or fourth of a batch of almond truffles and want to try another flavored center, try one of these flavors!
- Raspberry Cream Chocolates – recipe coming soon
- Lemon Cream Chocolates – recipe coming soon
- Almond Joy Copycat – recipe coming soon
- Peppermint Patties
- Orange Cream Chocolates – recipe coming soon
- Homemade Cherry Cordials – recipe coming soon
Once you see how easy a batch is to make, you’ll be making almond truffles for every occasion!
This truffle recipe is a great choice for a party treat tray, Christmas goodie, or edible gift for the ones you love.
FIND THE FULL PRINTABLE RECIPE HERE:
Almond Truffles
Scrumptious chocolate truffle with a smooth, creamy butter-flavored center and rich chocolate and toasted almond shell.
Ingredients
- 1 cup whipping cream
- 3 cups white granulated sugar
- 2 Tablespoons corn syrup
- 1 Tablespoon butter
- Butter flavoring, start with 1 1/2 teaspoons, add more if desired, the strength of flavoring will directly impact the flavor
- 3-4 cups Chocolate melted
- 3-4 cups almonds, toasted and chopped
Instructions
- In a large heavy saucepan add cream and sugar together. Let soak for a few minutes.
- After soaking, bring to a slow boil over medium to medium-high heat. Add corn syrup. Stirring constantly.
- Using a pastry brush and water to wash down sides of pan several times while boiling.
- Using a candy thermometer, cook to 238°F ***See notes regarding calibrating your thermometer.
- Pour mixture out onto a damp marble slab, cookie sheet, or chilled mixing bowl (avoid glass as the mixture is very hot). DO NOT scrape pot sides when pouring the mixture. This can cause the fondant to have a gritty sugary texture rather than smooth and creamy.
- Place 1 Tablespoon of butter in the center of the batch.
- Cool until warm to touch (5-10 minutes) then beat or use bread hook in an electric mixer. Beat until mixture turns creamy and dough-like.
- Add butter flavoring.
- Form into balls. If too sticky, chill the fondant before rolling. ***See notes for size.
- Chill centers for easier dipping and to help the truffle stay round after dipping.
- Dip chilled butter center into chocolate. Tap off excess chocolate as needed.
- Place in the bowl of chopped almonds and roll to coat. Let stand in the almond bowl until chocolate begins to set to avoid chocolate nut clumps.
- Place truffle on a cookie sheet lined with parchment or waxed paper until chocolate is set. Enjoy!
Notes
- The cream center base can be made several days before flavoring and dipping. I recommended making the fondant centers at least the night before or 24 hours before dipping to allow the sugar to soften.
- To calibrate a thermometer, put the thermometer into boiling water. Water boils at 212 degrees at sea level. Look up the boiling point of water for your altitude. Read the temperature of your thermometer when the water at a full boil. If it doesn't match the boiling temperature for your altitude, you will need to adjust your recipe temperature by the difference between the boiling point at your elevation and the temperature your thermometer is reading at a full boil. For example, if my thermometer reads 202 degrees when the water boils at sea level, my thermometer reads 10 degrees less than accurate. This means when I cook a candy that needs to reach 238 degrees, I will have met 238 degrees when my thermometer reaches 228 degrees (more or less assuming the error in the thermometer is constant across all temperatures).
- You will make approx. 150 truffles if centers are measured to 1 teaspoon each. You will make approx. 100 truffles if you use a 1/2 tablespoon portion scoop.
Recommended Products
As an Amazon Associate and member of other affiliate programs, I earn from qualifying purchases.


Original Post: 12.20.16 Updated: 1.11.21
These look so tasty! Yum!
These are to die for! So rich and creamy. Well worth the time to make!
Truffles are so good and so easy to make. These look really good and sound delicious! Almond butter is a great idea to use as an ingredient. I need to give these a try. 🙂
Oh my goshhhh this looks amazing! Will definitely Making these.
Liz
http://Www.lizzieinlace.com
YUMMY! These look AMAZING! And what an awesome family tradition
Rachel | The Confused Millennial
These look amazing, can’t wait to test them out
That sounds like such a fun family tradition! I want to do something like that!
I’ve never made truffles before but it doesn’t look that difficult.
These truffles sound delicious! What a great combo of flavors!
Wow those look amazing and the fact you made the truffles from scratch. Love this recipe!
This looks so yummy! I can’t believe how delicious this looks!
xo Debbie | http://www.tothineownstylebetrue.com
Oh my goodness, these look way too good! I have never had anything similar but they are making me drool.
Love almonds butter and truffles so thinking I could eat all of these by myself.
These look so awesome.. pinned!!
Oh my goodness, these look delicious! I wish I could come to one of your family gatherings, ha! Gorgeous photos too…
Wow! I was expecting “almond butter” (the nut spread) but this is way better! They look amazing!
In that case… surprise! 😉 An almond nut butter truffle would probably be a bit healthier but probably wouldn’t taste as divine as this one. Out of all the chocolates my family makes, this truffle seems to be the ultimate favorite. I hope you try it some time.