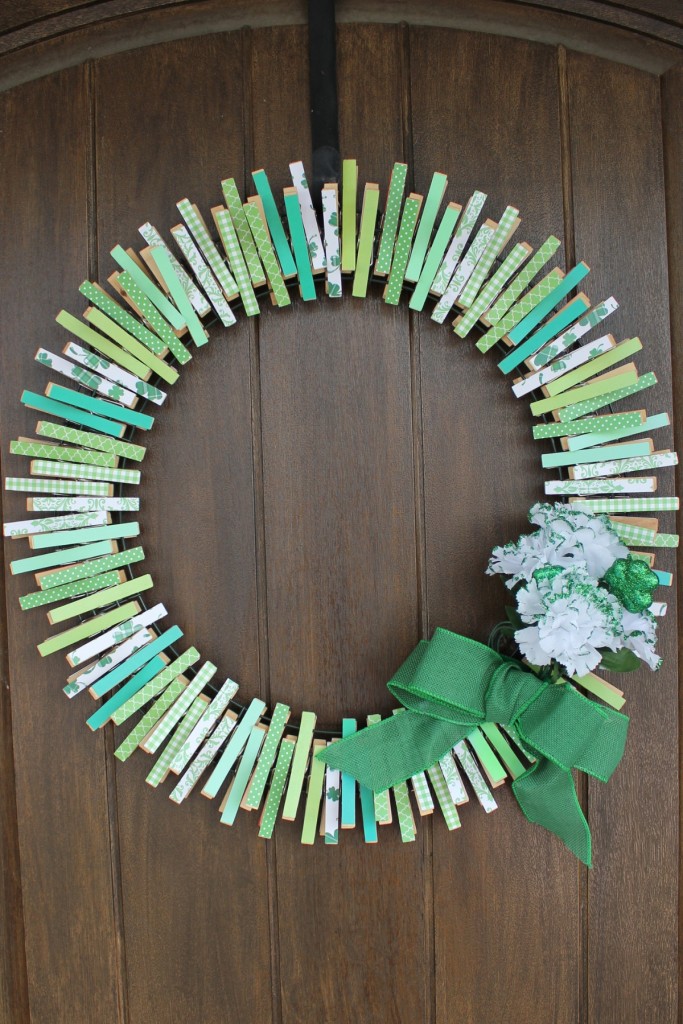
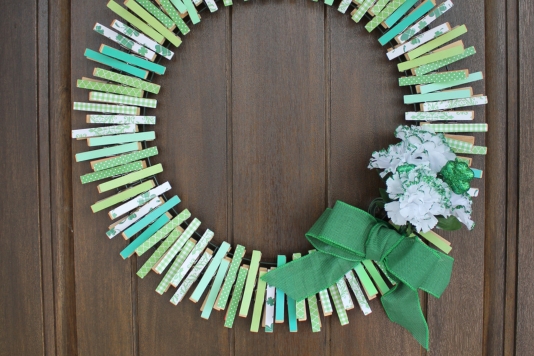
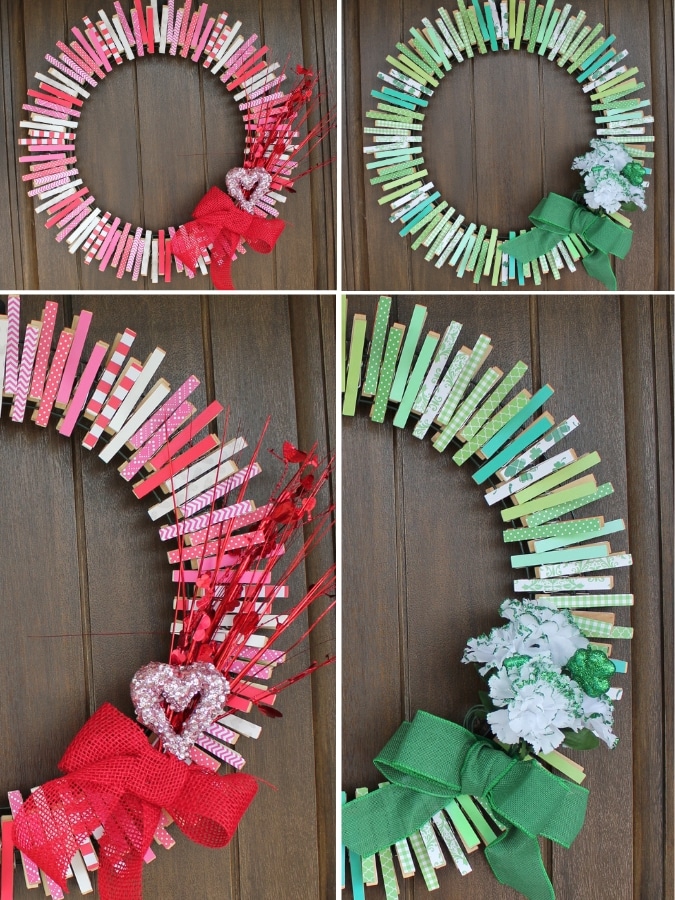
With Valentine’s Day past, on to St. Patrick’s Day we go. In January, I shared a fun DIY Valentine’s Clothespin wreath tutorial. I’m here to share the DIY Reversible St. Patrick’s Day Wreath side. 🙂 Yay! It’s full of shamrocks, greens, and whites. With its colorful clothespin design and fun embellishments, this wreath is a fun way to add some lucky shamrocks to your front door.
I’ve always felt like St. Patrick’s Day gets lost in all the hearts and colorful pastel eggs if you know what I mean. This fun DIY St. Patrick’s Day wreath makes it easy to go from red and pink to greens and lucky shamrocks.
Do you know what makes this wreath so great? You can show some love in February than flip it to the reverse side to show some luck for St. Patrick’s Day. The day after Valentine’s day, you can reverse the pins, switch the embellishment and Viola, this fabulous wreath turns into a St. Patrick’s Day beauty. How awesome is that?!
I won’t bore you with the back story but if you’re interested, check it out in Valentine’s clothespin wreath this post I shared at the beginning of the year. Let’s just say I was feeling crafty last December but needed to keep it inexpensive. I love when crafting is cheap or free. If you’re like me, you’ll love this wreath because it’s inexpensive and a 2-in-1. I want to say it was around $15 for both sides because I already had the Mod Podge. Here are the supplies I used:
- 8 different St. Patrick’s papers (greens, whites, shamrock, etc)
- 8 different Valentine’s papers (pinks, reds, whites, etc)
- 98 wood clothespins
- Mod Podge
- 18″ box wire wreath frame (you can find these at most craft stores. I found mine at JoAnn and used a JoAnn coupon).
- embellishments (hearts, flowers, clovers, shamrocks… I found most of my embellishments at the dollar store or craft store. I used burlap ribbon for both).
- wire or string to attach embellishments
Tools needed:
- paper cutter or scissors and ruler
- brush for mod podge
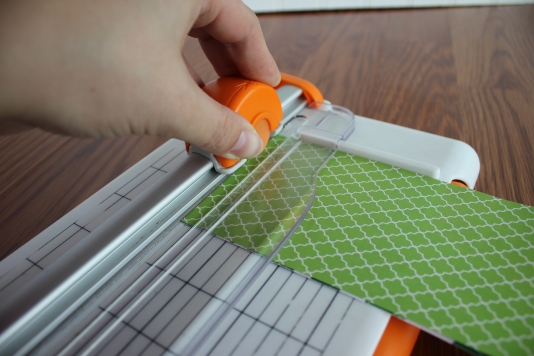
I started by cutting the little strips of paper. There’s a total of 98 clothespins so you’ll need 196 strips total–98 for St. Patricks day and 98 for Valentine’s. Depending on how many different paper patterns you choose will determine how many of each paper you will need to cut. I chose 8 different patterns for each side, so I needed 13 of each pattern. If you have 8 patterns for each holiday, you’ll end up with a few extra (104). Cut each paper to fit the length of your clothespins. Most clothespins are about 3 1/4 inches long and 3/8 inch wide.
Double check by finding the measurements on the clothespin package or measuring the clothespins yourself. You don’t want to cut them all only to find out they don’t fit. 🙁
I found it was easiest to work on one side at a time. It’s also easier to switch the wreath between holidays if the papers matched for the different holidays when flipped. For example, I wanted all the red polka dot paper to be on the same pins as all of the green and white clover paper. After figuring out what paper patterns I wanted to use together, I brushed a small amount of mod podge on one side of the clothespin, apply the paper, then mod podge over the paper to seal it. Then I let it dry.
After the first side was dried, I did the same thing to the opposite side with the paper for the second holiday.
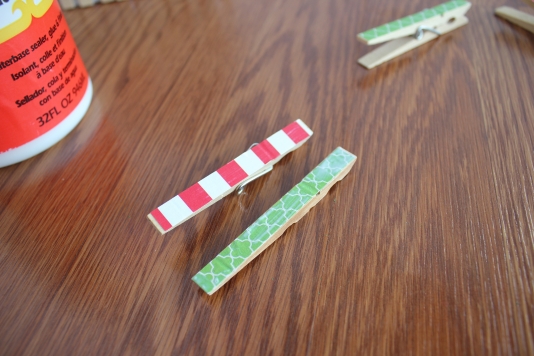
I took this clothespin apart after finishing it so you could see each side. The Valentine’s side is red and white stripes and the St. Patrick’s day side is a green pattern.
I just loved having so many different patterns yet they all had a common theme. 🙂 Aren’t they so pretty?
I ended up with a very large pile of colorful clothes pins. At first, it almost looked like to many for the wreath, but then I started putting them onto the wire wreath… boy was I wrong.
Before I put them on the wreath, I sorted each pattern into an individual pile. This made it much easier putting the wreath together. I didn’t have to hunt for the next pattern. I also lining them up in the order I wanted to place them on the wreath. It helped me keep the correct pattern without missing any.
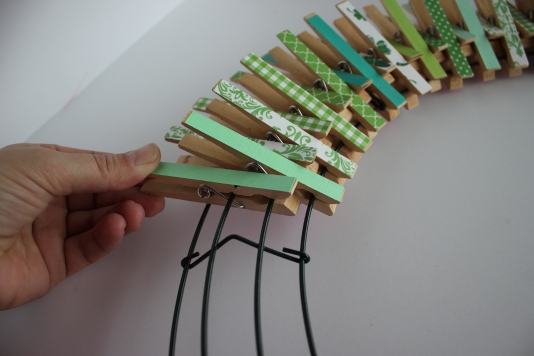
When I clipped the colorful clothespins onto the wreath frame, I chose to alternate, using the bottom two wires then the middle two. You could get creative with this by clipping sets of two or three and alternate that way. I liked to alternate every clothespin because it gave the wreath a fun wavy look. Whichever way you choose to go, just make sure you always clip two wires. That will secure the clothespins so they don’t fall off or spin.
Once the wreath was full, I made my embellishments. For the St. Patrick’s Day side, I used a couple bouquets of silk white carnation with green glitter peddles and glitter shamrocks. I pick them up at the dollar store along with a small roll of 2-inch wired burlap. It cost a whole $3 which made it all the better. Cheap or free, right? 😉 For the Valentine’s Day side, you can check out the Valentine’s Clothespin wreath post here.
To attach the embellishments to the wreath, I used a green pipe cleaner. I figured if it showed at all, green would be the best color to go with. 😉 Whatever method you choose to use in attaching the embellishments, make sure it’s removable because you’ll need to remove it to reverse the sides.
Here’s the embellishment attached and the wreath all done. I’m already filling lucky! 😉
That’s it. It really is an easy, fun craft that can be made for any holiday.
Now, our new festive holiday wreath is hanging on our front door. (It has actually been hanging around since January, just sporting the reds, pinks, and whites for V-day 😉 ). The Valentine’s Day side brought us a lot of love and now I’m hoping the St. Patty’s Day side will bring us a little luck and a leprechaun or two. Haha.
Oh, one more note–I hang mine directly to a door hanger, but you could totally deviate and attach a ribbon to the wreath. It might add a little extra flare.
What do you think? If you could only have one side, which would you choose? … Just kidding, you don’t have to choose. You can have them both!
I just love this wreath, especially because I can use it for more than a month. 2-in-1 is always better when it comes to holiday decor!
*This post contains affiliate links. In order to support this blog and continue providing free content, I may receive a commission from purchases you make through the links in this post.
Can’t wait to make it
Thanks so much, Kim! I was really fun to make. I hope you enjoy yours as much as I do!
I just love this glad I came across it