Discover the aromatic delight of homemade Pear Jam infused with real vanilla beans! Learn to make this shelf-stable, sweet preserve at home with my step-by-step guide, tips & FAQs.
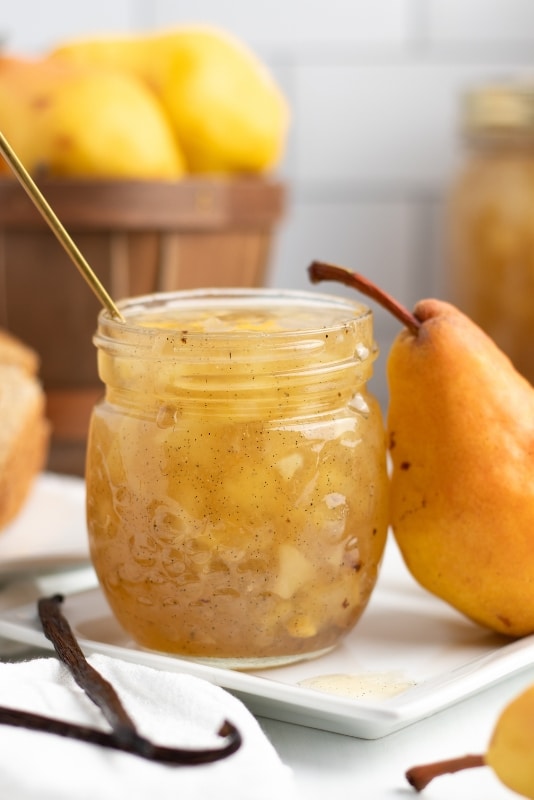
Imagine spreading a sweet, aromatic pear jam infused with real vanilla beans over your morning toast or using it to sweeten your favorite desserts! This homemade Pear Jam is not only delicious but is also shelf-stable, making it perfect for storing or gifting. Explore this easy-to-follow recipe, and elevate your breakfasts and desserts to a gourmet level with this flavorful preserve!
Ingredients Needed:
- Pears: If you want to skip the process of peeling the pears opt for a thin-skinned pear variety such as Bartlett
- Fresh lemon juice: If fresh isn’t an option grab bottled, it will still do the job
- Dry pectin: I use Ball RealFruit Classic Pectin because it is cheaper and around canning season sometimes pectin is hard to come by. The amount you will need is equivalent to most single recipe box pectin (1.75oz)
- Sugar
- Butter (optional): this helps lessen foaming
- Vanilla bean pods: I order my beans in bulk (10 beans at a time) off Amazon. They are usually around a dollar a bean. In the grocery store they will range from two to nine dollars for one to two beans. If whole bean pods aren’t an option you can also use vanilla extract, vanilla bean paste or omit it.
Equipment Needed:
- Canner or Large Pot: This is used for the water bath method to make the jam shelf-stable.
- Jars and Lids: You’ll need jars with lids and rings to store your pear jam.
- Medium Saucepan: This is used to cook the pears and other ingredients together.
- Bowl: A small bowl is needed to mix the pectin and sugar.
- Ladle: This will help in transferring the jam to the jars.
- Canning tongs: This will help place and remove the jars from the water bath.
How To Make Pear Jam At Home:
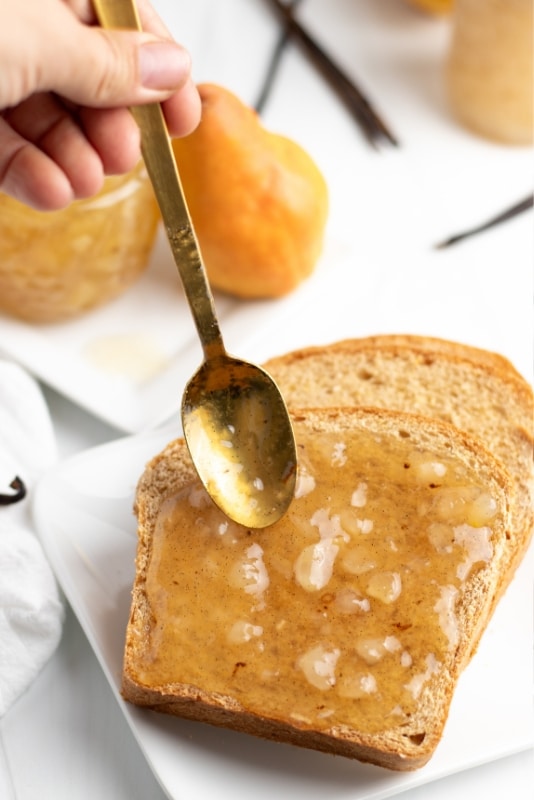
Creating Pear Jam at home is a simple and rewarding process. Here’s a concise step-by-step guide to help you make your delightful pear and vanilla preserve:
1. Prepare the Canner:
- Fill the canner or a large pot half full with water and bring it to a boil.
- Once it starts boiling, reduce the heat to a simmer. This will be used later for the water bath process.
2. Sanitize the Jars:
- Clean the jars, lids, and rings with hot soapy water and rinse them thoroughly.
- Let the lids soak in hot water until they are ready to use.
3. Prepare the Pears:
- Firstly, dice the pears into small pieces. If you’re using pears with thin skins, such as Bartlett, there’s no need to peel them. However, for other varieties, it’s recommended to peel them to achieve a smoother texture.
- As you dice the pears, tossing them in the lemon juice can keep them from turning brown.
4. Cook the Pears:
- In a medium saucepan, combine the diced pears and lemon juice.
- Bring the fruit mixture to a boil.
5. Add Pectin and Sugar:
- Mix the pectin with 1/4 cup of sugar in a small bowl and sprinkle it over the boiling fruit mixture.
- You can add butter at this point if you want to reduce foaming.
- Bring the mixture back to a boil and add the remaining sugar, boiling for an additional minute before removing it from the heat.
6. Infuse with Vanilla:
- Cut the vanilla bean pods in half and scrape them to remove the seeds.
- Add the seeds to the pear mixture and stir until they are well dispersed.
- If you’d like you can add the scrapped pods too.
7. Prepare the Jars for Processing:
- Using a ladle, immediately fill the prepared jars with the pear jam mixture, leaving 1/2 inch space at the top.
- Wipe the jar rims with a clean using a wet rag or paper towel to ensure a good seal. Don’t skip this step as it can remove anything that might make the jars not seal.
- Place the lids on the jars and screw the rings tightly.

8. Process in Water Bath:
- Use an elevated rack in the bottom of the canner or large pot.
- The jars should be submerged in boiling water for 10 minutes to process them.
- Ensure that the water is at a soft boil and that the jars are not touching each other.
9. Cooling and Storing:
- After processing, carefully remove the jars using canning tongs and place them on a towel to cool completely.
- Once cooled, ensure that the lids have sealed properly by pressing the middle of each lid.
- If the lid is firm and does not spring back, the jar has successfully sealed and is ready for storage.
- If the lid makes a pop or clicking sound the jar has not sealed. You can remove the lid, wipe the rim of the jar and repeat steps 7 through 9 or refrigerate and use within 3-4 weeks.
Following these steps carefully will ensure that you have delicious, shelf-stable Pear Jam to enjoy at home or share as a delightful homemade gift!
Pear Jam: FAQs
What kind of pears should I use to make pear jam?
Any variety works, but those with thinner skins like Bartlett are preferred as they don’t need peeling, resulting in a smoother texture.
Where can I buy vanilla beans?
You can find vanilla beans at well stocked grocery stores, gourmet food stores, specialty spice shops, or reputable online retailers. I like to buy vanilla beans in bulk,10 at a time, from Amazon. This seems to be the most economical option as the beans end up costing about a dollar per bean.
What can I substitute in place of vanilla beans?
You can use vanilla extract or vanilla bean paste as substitutes. Typically, one vanilla bean equates to 1 tablespoon of vanilla extract or 1 tablespoon of vanilla bean paste. Vanilla bean paste will offer the beautiful little black speckles of vanilla seeds. Vanilla extract will offer flavor but no visual offering.
Can I use a large pot for the water bath (in place of a canner)?
Yes, a large pot can be used as long as it is deep enough to fully submerge the jars in water by at least one to two inches, and allows for proper circulation of water around the jars during processing. Make sure to add a cloth or rack in the bottom of the pot so the jars aren’t in direct contact of the pot or heat.

Pear Jam Storage Tips:
Store your sealed, shelf-stable pear jam in a cool, dry place away from direct sunlight. It will remain fresh and flavorful for 1+ years when stored properly. After breaking the seal, ensure that the jam is refrigerated and consumed within 3-4 weeks to maintain its taste and quality. Use clean, dry utensils to avoid contamination.
Pear Jam Recipe Card:
Embark on a flavorful journey with this aromatic Pear Jam, enriched with the goodness of fresh pears and the exquisite flavor of vanilla beans. The step-by-step guide above makes the process easy and fun. Whether you’re a novice or an experienced cook, you’ll find making this pear jam incredibly rewarding. The detailed recipe card below offers all the specifics you need to create this sweet, aromatic preserve at home. Enjoy it on toasts, desserts, or as a sweet gift to your loved ones!
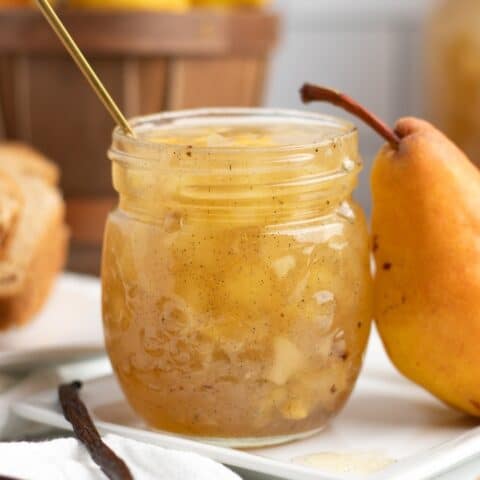
Pear Jam
Discover the aromatic delight of homemade Pear Jam infused with real vanilla beans! Learn to make this shelf-stable, sweet preserve at home.
Ingredients
- 4 cups pears, small dice (buy about 3 pounds) (see notes)
- 2 Tablespoons fresh lemon juice, bottle will work too
- 1.75 ounces (or 1 box) dry pectin, I used 1.75 ounces Ball RealFruit Classic Pectin
- 5 cups sugar
- 1/2 teaspoon butter, optional to help reduce foaming
- 2 vanilla bean pods, cut in half then scraped to remove vanilla bean seeds
Instructions
1. Prep canner by filling it half full with water and heat until boiling then reduce heat to a simmer. Sanitize jars, rings with hot soapy water then rinse clean. Let lids soak in hot water until ready to use.
2. In a medium sauce pan, add diced pears and lemon juice. Bring fruit to a boil.
3. In a small bowl mix the pectin and 1/4 cup sugar. Sprinkle over boiling fruit mixture. Add butter if desired to help reduce foaming.
4. Bring back to a boil and add remaining sugar. Boil for 1 minute then remove from heat.
5. Add vanilla bean seeds. Stir until dispersed.
6. Immediately ladle pear jam mixture into prepared jars. Leave 1/2 inch space at the top. Wipe jar rims with a wet rag or paper towel to insure a good seal. Cover with lid and ring. Screw the ring tightly.
7. Process via water bath using an elevated rack in the bottom of the canner. Bring water to a soft boil. Process jam jars for 10 minutes. Remove jars and place on towel to cool completely. After the jars are cooled check to insure a good seal my pressing the top middle of the jar lid with your finger. See notes.
Notes
PEARS: If using a pear variety with thin skin such as Bartlett there is no need to skin the pears. If using another variety with thick skin it is recommended to remove the skin to create a smoother texture.
VANILLA: If whole vanilla bean pods are not an option for you, you can omit or sustitute 2 tablespoons vanilla extract or vanilla bean paste.
CHECK FOR SEAL: If it makes a pop or click sound it has not sealed. If it is firm and does not spring back the lid has successfully sealed. If jar did not seal refrigerate and use within a few weeks. If sealed they are now shelf stable and if stored properly will keep at room temperatures for 1+ years. After opening, keep refrigerated and use within 3-4 weeks.
Recommended Products
As an Amazon Associate and member of other affiliate programs, I earn from qualifying purchases.

