Make your own Homemade Gourmet Caramel Apples for a fraction of the candy shop price. Crisp, tart granny smith apples covered in homemade caramel and gourmet toppings made right at home.

Caramel apples are a fabulous special treat that can be enjoyed year round.
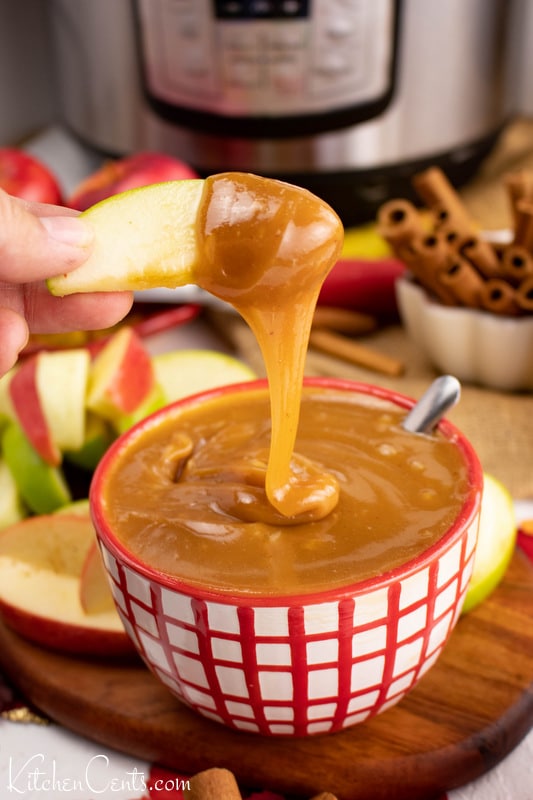
These gourmet caramel apples are made with the best homemade caramel.
Add your favorite chopped nuts, chocolate, sprinkles, etc to make them your very own and totally gourmet. The “apple pie” caramel apple is my ultimate favorite!
HOW TO MAKE CARAMEL APPLES
- Preparation: Before you even begin making the caramel, make sure your apples are washed thoroughly. This helps to remove any wax or residue that may prevent the caramel from sticking to the apple. Completely dry the apples and remove the stems.
- Sticking the Apples: Firmly push the apple sticks or popsicle sticks into the top of each apple. Ensure it’s securely in place.
- Caramel Dipping: Once your caramel is ready (recipe below), tilt the pot slightly, and dip each apple into the caramel, swirling it around to get an even coating. Let the excess caramel drip off for a few seconds.
- Toppings: Before your caramel sets, you can roll the apples in toppings like crushed nuts, mini chocolate chips, or even crushed cookies. To make it even more gourmet, drizzle melted white or dark chocolate over the top (after the caramel has cooled).
- Setting: Place your dipped apples onto a tray lined with parchment paper or nonstick silicone mat. Let them cool and set completely. This could take a couple of hours, but if you’re in a hurry, you can pop them in the fridge to speed up the process.
- Enjoy: Dive into your sweet tart homemade caramel apples or wrap , box or bag for a gourmet gift for friends, family or neighbors.

Homemade Caramel Apples: FAQs
What variety of apple is best for caramel apples?
When diving into the world of caramel apples, Granny Smiths tend to be the front-runners. Their tart and crisp flavor creates a perfect balance with the sweetness of the caramel. Look for ones that are firm to the touch and sport a vibrant green hue.
While Granny Smiths are undeniably a classic choice for gourmet caramel apples, the beauty is that you’re not restricted to them. Feel free to explore and use your favorite apple variety!
Selecting the perfect caramel for your Apples
Wondering which caramel gives the best coating for your apples? Look for a caramel that offers a thick, luscious coat but remains soft and delightful upon biting once cooled.
I have a soft spot for homemade caramel! Check out the recipe below to make my top pick for caramel apples. It’s a game-changer — straightforward, with a minimal chance of crystallization and a mouthwatering taste.
Of all the variations I’ve experimented with (and trust me, it’s been quite a few!), the recipe provided below truly stands out as the champion.
Short on time? Here’s a quick caramel fix!
Pressed for time but still craving that caramel apple goodness? No worries! While homemade caramel (recipe below) is a treat, store-bought caramel squares work perfectly fine for a quick alternative.
When I opt for pre-packaged caramel squares, I like to enhance their consistency by adding a touch of cream. Typically, mixing in 2-3 tablespoons of cream to 1 cup of caramel squares gives it a smooth, dippable texture. However, if you prefer a faster setting caramel or a firmer bite, simply melt the caramel squares on their own without the added cream.
Should I wash my apples before dipping?
Yes, you should definitely wash your apples before dipping… but make sure to handle your apples with care. There are several reasons for this:
- Removing Dirt and Pesticides: Apples, like all produce, may have traces of dirt, pesticides, or other residues on their surface. Washing ensures you’re getting rid of these potential contaminants.
- Eliminating Wax: Commercially sold apples often have a wax coating to make them shinier and more appealing. This wax can also act as a barrier, preventing the caramel from adhering properly to the apple. Washing helps to remove some of this wax.
- Improved Adhesion: A clean apple surface ensures that the caramel can stick properly. Any residue or barrier can lead to uneven coating or make the caramel slide off.
Make sure NOT to puncture of scratch the apples skin as this can cause bubbles in the caramel later.
Why are bubbles forming under my caramel after dipping?
There are a few reasons bubbles might form under the caramel when you dip your apples:
- Micro scratches or punctures: If the apple was handled roughly during prep this can cause scratches in the skin or punctures. When the hot caramel coats the apple the apple will heat and moisture will come to the surface. If there are scratches or punctures this will cause the caramel to form bubbles. This has been the number one culprit for me when making homemade caramel apples.
- Residual Moisture: If the apples are not dried properly after washing, the trapped moisture can turn into steam when the cold apple is dipped into the hot caramel, leading to bubble formation.
- Air Pockets: If the apple isn’t dipped smoothly or if it’s pulled out of the caramel too quickly, air can get trapped, forming bubbles.
- Natural Imperfections: Sometimes, the natural nooks and crannies on an apple’s surface can trap air, leading to bubbles.
To avoid these issues, ensure your apples are carefully washed and completely dry. Also, dip them slowly and steadily to ensure a smooth, bubble-free coating.
If sizable bubbles appear, swiftly puncture them with a toothpick before the caramel sets. Strategically place toppings to mask any imperfections.
HOW MUCH DO CARAMEL APPLES COST?
Crafting gourmet caramel apples at home can be delightfully affordable!
I often purchase ingredients in large quantities, keeping an eye out for promotional deals. I’ve sourced the following ingredients at these remarkable prices:
- Dark brown sugar (2 lb) – $1.19 at Macey’s, costing $0.60 per batch.
- Corn syrup (1-gallon) – $9.99 at Macey’s, translating to $0.63 per batch.
- Sweetened condensed milk (1 can) – $1.23 at WinCo, which sums up to $1.23 per batch.
- Butter (1 lb) – $1.99 at Smith’s, or $1.00 for each batch.
- White chocolate (12 oz) – $1.49 at Macey’s, adding $0.05-0.10 per apple.
- Mini chocolate chips (12 oz) – $1.49 at Macey’s, contributing $0.10 to each apple.
- Dry roasted peanuts (16 oz) – $1.99 at WinCo, at $0.14 per apple.
- Almonds (1 lb) – $3.99 at Sprouts Farmers Market, costing $0.27 for every apple.
- Granny Smith apples (1 lb, or 2-3 apples) – $0.88 at Sprouts, ranging from $0.33 to $0.44 per apple.
- Apple sticks – Depending on the type, these can vary from $0.01 to $0.10, be it flat popsicle sticks or round bamboo sticks.
Given these costs, a batch of my homemade caramel can generously coat 12-15 apples, contingent on their size. Using smaller apples, which I found to be 3 per pound, the total expense per gourmet caramel apple ranged from $0.72 to $0.94, depending on the chosen toppings.
Admittedly, these prices were a steal. Even so, if you were to source these ingredients at regular market prices, I’m quite certain the cost would stay below $2.00 per apple (2023).
Given such affordability, they serve as the perfect gourmet treats for gifting or celebrating special moments!

EATING CARAMEL APPLES – MADE EASY
To truly savor a caramel apple without the mess, consider slicing it into bite-sized pieces. Here’s a foolproof method I swear by:
Picture a game of tic-tac-toe. Slice your apple in this pattern, and you’ll effortlessly remove the core while ensuring every piece boasts a generous caramel coat. However, if you’re feeling bold and traditional, dive right in and enjoy it straight off the stick. It might get messy, but the delightful taste remains unchanged!

GOURMET TOPPING IDEAS FOR YOUR CARAMEL APPLES
Elevate your caramel apples from ordinary to gourmet with these enticing toppings:
- Nuts: Think peanuts, almonds, or pecans for a crunchy bite.
- Chocolate: Drizzle with white, milk, or dark chocolate for added richness.
- Candies: Options abound with M&Ms, Reese’s pieces, Snickers, Butterfingers, and more.
- Cookies: Crushed Oreos or graham crackers can add an exciting texture.
- Sprinkles: Because who doesn’t love a burst of color?
Feeling creative? Combine these toppings for some decadent caramel apple variants:
- Apple Pie Caramel Apple: A thin white chocolate coating, rolled in cinnamon sugar. It’s reminiscent of a classic apple pie. This flavor is my family’s all-time favorite!
- Smores Caramel Apple: Enveloped in crushed graham crackers, chocolate drizzle, and topped with mini marshmallows.
- Turtle Caramel Apple: Pecan-coated and generously drizzled with chocolate.
- Tuxedo Caramel Apple: A dual dip – first in white chocolate, followed by milk or dark chocolate.
- Birthday Cake Caramel Apple: Dive into white chocolate and roll in vibrant sprinkles.
- Hot Chocolate Caramel Apple: Dipped in milk chocolate and adorned with mini marshmallows.
- Oreo Lover Caramel Apple: A delicate white chocolate layer, rolled in crushed Oreo goodness.
Storage Tips
After putting so much effort and creativity into your caramel apples, you surely don’t want them to go to waste too quickly. Here’s how you can store them:
- Room Temperature: If you plan on eating your caramel apples within 2 days, you can store them at room temperature. Just ensure they’re in a cool, dry place away from direct sunlight.
- Refrigeration: For longer shelf life, you can refrigerate your caramel apples. Store them in an airtight container to prevent any moisture or other flavors from seeping in. They can last for up to a week when refrigerated.
- Revive a Chilled Apple: When you’re ready to eat or serve a refrigerated caramel apple, allow it to sit at room temperature for about 20 minutes. This ensures the caramel is a bit softer and more enjoyable to bite into.
A Little Background On The Caramel Apple
The tradition of coating fruit in sugar syrup dates back at least to the Renaissance. The caramel apple as we know it, however, was purportedly created in the 1950s when a Kraft Foods employee named Dan Walker melted down some of the company’s large stock of Halloween caramels, then dipped apples into the resultant concoction. It was a sweet “accident.”
Today, the caramel apple is a nostalgic favorite around Halloween but can be enjoyed year-round, especially when we put gourmet twists on it as listed above!
Join The Caramel Apple Conversation
I hope you’ve enjoyed this comprehensive guide to creating your very own gourmet caramel apples at home! Remember, the key is creativity. Feel free to mix and match toppings or even come up with your own unique combinations.
What’s the most unique caramel apple you’ve ever tried or heard of? Or perhaps you have a special memory associated with this treat? I’d love to hear your stories and see your caramel apple creations. Share your photos with the hashtag #KitchenCentsRecipes and let’s get the caramel conversation rolling!
Thanks for reading, and happy dipping!
More Fall Recipes You Might Enjoy:


There’s nothing quite like biting into a homemade caramel apple, especially when you’ve made it yourself! They’re perfect for festive occasions, birthdays, and even just a regular day when you’re craving something sweet and special. Enjoy your gourmet treat without the gourmet price tag!
Homemade Caramel Apples Recipe Card:
Gourmet Caramel Apples
Ingredients
- 12-15 granny smith apples
- gourmet toppings chopped nuts, chocolate, white chocolate, cinnamon sugar, sprinkles, chopped candy or cookies
- popsicle or apple sticks
- 1 14 oz can sweetened condensed milk
- 1 lb dark brown sugar about 2 1/4 cups packed
- 1 cup salted butter
- 1 cup corn syrup
- 1 teaspoon vanilla extract
Method
- Wash and dry apples. Carefully poke stick straight into tops of apples. Place in fridge to chill while you make the caramel.
- In a large pot add sweetened condensed milk, dark brown sugar, salted butter, and corn syrup. Cook over medium to medium-high heat stirring constantly to avoid bottom from burning.
- Mixture will begin to bubble and increase in volume. Avoid scraping sides of pan as this can make the sugar in the caramel to crystallize and go "grainy." Using a calibrated candy thermometer, cook mixture to 235 degrees F or soft ball stage.
- Remove from heat and add vanilla.
- Let caramel cool slightly (5 minutes or so) before dipping apples. This will ensure you get a nice coat of caramel on the apples. The warmer the caramel, the thinner the caramel coating will be and the more it may "pool" when placed on a cooling tray.
- Dip each apple into the hot caramel to coat. Let excess drip off then turn slowly to allow caramel to begin to cool. If dipping or rolling in nuts, cookies or candy, do that before caramel sets and hardens.
- If adding chocolate or chocolate drizzle place caramel-coated apple onto a parchment paper lined cookie sheet and place in the fridge to cool. Once cooled drizzle or coat with chocolate and add other toppings as desired.
- Work quickly as the caramel in the pot will begin to harden as it cools. If the caramel becomes too hard to coat apples smoothly, warm over medium heat until mixture is fluid again. Don’t overheat.
- Once apples are finished and cooled completely, enjoy or wrap for gifts.
Notes
Tried this recipe?
Let us know how it was!*This post contains affiliate links. In order to support this blog and continue providing free content, I may receive a commission from purchases you make through the links in this post. This comes at no cost to you. It just helps me keep the delicious recipes coming. 
Updated: 09.12.23 O.P. 12.6.18
Hi. I have a question? Did you change the recipe? I don’t recall it having sweetened condensed milk. If so, may I have the previous recipe? Thank you.
Hi MaryLou. I haven’t changed the recipe. This caramel recipe has always called for sweetened condensed milk.
The best thing of this recipe is that these ingredients are great when they mix together
Thanks for the comment. I totally agree!
I have a party coming up soon and I know that these would be perfect as table decor. The only thing I’m worried about is that I won’t ruin the drizzling part.
Super cool idea. These would make for a beautiful table décor. The drizzle is really simple. Just put your melted white chocolate in a ziploc bag and snip a tiny hole in the corner. Test the hole size by lightly squeezing the bag. If it doesn’t flow semi-easily cut it a little larger. Lightly squeeze the bag to get a steady stream then move your hand quickly back and forth. Turn the apple to do the other side. Voila! You’ve got this!
I have tried this 3 times now and have failed 3 times. What am I doing wrong? The Carmel is either so hard it breaks your teeth or so soft it drips right off the apple or it burns and tastes terrible. Some recipes say thermometer should be 240 some say 250 some say 235. Which is it? Sometimes it looks about right then it cools to much and gets super thick, reheating has not worked. I’ve been told that it’s all about the pot you cook it in. Any suggestions?
Hi Carol! I’m sorry to hear your struggles with making caramel. Here are a few of my thoughts. Make sure to calibrate your thermometer for your elevation. This can become a huge issue if it’s off even a few degrees. For caramel apples I cook the caramel mixture to soft ball temperature (235 degrees F.). Another thing you mentioned was the pot you use. Yes, this can effect the cooking process. A thicker pot will distribute the heat more evenly and prevent the mixture from burning. If using a thin pot you will want to be diligent about stirring the mixture constantly and scrapping across the bottom. If the caramel comes out too hard AND it’s not burnt you can add a small amount of water (1/4 cup) bring it back to 235 degrees (or lower if that’s what you did the first time and it came out too firm). To test if it’s too firm, dip a metal spoon into the hot caramel, place the caramel-covered spoon in a cup of ice water until cooled enough to eat it. Don’t let it get too cold or it will just be hard. You want it to be around room temperature as the apples will be at room temperature when eaten. This will allow you to see if the temperature you cooked it to was too high or too low. Too firm = too high. Too soft = too low. If it’s to firm add the water and reheat to a lower temperature. If it’s too soft heat until it reaches a higher temperature and recheck. I hope this helps.
Hi! Is it possible to double the caramel recipe? Any time adjustments I need to make?
Absolutely! it will take longer to come up to temperature (235 degrees F) and if you are doubling the amount of apples you’ll be dipping, that will take longer too. Hope this helps. Happy dipping!
I’m thinking of making a few different gourmet apples for a farmers market next weekend. My question is how should I display them? Should I leave one out of each flavor and the rest in a cooler? Thanks for any tips
Hi Adriana! Thanks for stopping by. So cool to hear about your farmer market. If you live in a very warm climate, consider pictures while keeping the apples in a cooler. If your climate permits I would definitely display each kind and keep the rest in a cooler. Having your actual apples on display would promote sales in my opinion. Good luck!
I need to make 3 dozen apples for a party plus cupcakes. How far in advance can I make the apples and how do I store them. I’m worried about the apples souring or going bad
Hi Micha!
I’ve made these up to 5 days ahead. If you buy premium apples that have been waxed, they can stay good if stored in a cool dry place for a long time (like a month or two). Because these apples will be coated with caramel (wet) you should be fine to make them at least a couple of days ahead.
The bigger issue I’ve dealt with when making these ahead is the caramel being too soft and “melting” off the apple. Just make sure you use a calibrated thermometer when cooking the caramel to make sure it is thick enough AND store the finished apples in the fridge. The cold will help everything stay fresh and in place. I hope this helps! Good luck.
P.S. If you plan to wrap them, make sure your wrapper, clear back or whatever you put them in minimally touchest the caramel. If the wrapper touches the caramel there’s a chance it will stick. I use a small plastic or paper plate in the bottom that’s larger than the apple to help push the wrapper away from the apple. If you look below, there are a couple of affiliate links I’ve left in another comment a couple of weeks back.
Used to use to wrap them? It seems like they would get stuck to the paper? Thank you
Once the apples are done (chilled after dipping and coating with gourmet toppings) I place each one on a small plate (4-5 inch diameter) or shallow large treat cup (link below), something that’s at least an inch wider than the base of the apple. The cup or plate will allow room for the apple in your packaging without letting the wrap stick to the caramel. I use food-grade cellophane bags (about 4-5 inches wide by about 8-9 inches tall) and ribbon or twistie ties to close them. Here are some affiliate links that might be helpful.
Large treat cups – https://amzn.to/2Nuislp
Clear bags – https://amzn.to/2LJlXTg
If you don’t want to spend a lot of money, you can use a small disposable plate and a piece of parchment paper then wrap with cellophane or by using a clear treat bag. I hope this helps! These make great edible holiday gifts!
Your apples look amazing!!! Thanks for the de recipe, tips, and cost breakdown. I am wondering if once you get the caramel to the right temperature, can you transfer it to a crockpot on warm to use for a group of people to make their own apples.
Thanks Sue! I’ve never tried that but in theory, a crockpot should keep it warm enough to work. If the caramel cools too much it will be hard to get a smooth, thin layer of caramel. I’d love to hear how it goes if you use a crockpot for dipping! Thanks for stopping by.
Hi. I have used a 3 pot slow cooker. I used 1 pot for caramel the other for chocolate then last for white chocolate. And my dipping went great. Just like an assembly line.
Oh, man! That sounds amazing! What a brilliant idea. Thanks for sharing.
How long does the caramel apples need to sit in the fridge before you can dip them in chocolate? How long does it take after that to set? Also, do you have any suggestions for melting the chocolate? Thank you so much!!
Hi, Bethany! As long as the caramel is cooled you can add the chocolate. The colder they are, the faster the chocolate will set. If you are drizzling white chocolate I would chill them for at least 30 minutes. They will set and be ready to package within a few minutes. If you are planning to spread white chocolate and roll in cinnamon sugar, I would only chill for 5-10 minutes otherwise the white chocolate may set too quickly and the cinnamon sugar won’t stick.
There are lots of ways to melt the chocolate. When I’m in a hurry I usually just melt the chips in a microwave safe bowl in the microwave. 15-30 seconds at a time, stirring in between. It should only take a few times heating it to be melted.
Hope this helps. I’d love to hear how they turn out for you! Thanks for stopping by.
How far in advance can I make these?
Hi Cin! Fresh is best but I’ve made them up to a week in advance. You’ll just want to keep them cold (in the fridge). I hope this helps.