A smooth, airy, eggless mousse filled with fresh raspberries and cream! This raspberry mousse is an easy 4-ingredient dessert perfect for any occasion!

Are you looking for the perfect Valentine’s treat?! Or a special occasion dessert?
I’ve got your back!
This raspberry mousse is smooth, creamy, and so pretty with its beautiful pink color. It’s a simple eggless mousse that uses gelatin to make it stable. It only requires 5 ingredients (including the water which almost doesn’t even count) which you might already have on hand.
When you and your loves (family, friends, girlfriend, boyfriend, kids…) taste this raspberry mousse they will think you spent hours making it when really, it only takes about 15 minutes to whip up.
One of my most favorite things about this mousse is that it’s eggless. That means… the steps to make it are more simple and you don’t have to worry about raw eggs.
If you like this recipe you may also like these MOUSSE recipes:
- Raspberry Eclairs
- Strawberry Mousse
- Easy 3-Ingredient Chocolate Mousse
- Raspberry Mousse Brownie Bites
- Mint Mousse Chocolate Cups
- Raspberry Chocolate Mousse Cake

4 (5 if you count the water) Simple Ingredients To Make This Raspberry Mousse!
I bet you’ve guessed what 4 ingredients I use to make this pretty pink raspberry mousse but if not, here’s the breakdown.
- raspberries (I use fresh frozen in the off-seasons and fresh, fresh when we can pick them from our patch).
- sugar
- gelatin
- cream
- water (but as you already know, I kind of don’t think this one counts in the ingredient count even though I know it really is one).
Cream, sugar, raspberries= quick, easy, and delicious raspberry mousse. <3
HOW DO I MAKE THIS EASY RASPBERRY MOUSSE?
Bloom the Gelatin:
To make this raspberry mousse, start by softening the gelatin.
This is done by pouring the gelatin in cold water. The gelatin will soak up all the water. This is called blooming the gelatin.
It only takes a few minutes for the gelatin to be ready. This is what it looks like after it has bloomed.

Make the Sweetened Berry Mixture:
While the gelatin is softening, put the raspberries, sugar and a little water in a small saucepan.
Heat the berries and sugar until the berries begin to break down. Depending on if you’re using fresh or fresh still frozen berries, this may take up to 5 or 6 minutes.

Pour the berry mixture into a blender.
I love my Blendtec! If you haven’t checked out Blendtec blenders, do. They are amazing. I love mine!
Puree the berry mixture for about a 1 minute until the berries are smooth.
At this point you have two options: move forward with the seeds in the mixture or use a fine strainer to remove the seeds.
This mousse will be very smooth if you remove the seeds and I highly recommend doing so. If you’re in a hurry, you don’t have to remove the seeds but realize the texture will be different because you’ll have a couple of tablespoons of raspberry seeds in the mousse.
Once ready, pour the berry mixture back into the saucepan and add the softened gelatin to it.
Place the saucepan back on the heat (medium to medium-high) until the gelatin is melted. This will only take 30 seconds to a minute. Make sure you watch it closely because it can boil over quickly.

Whip the Cream:
Once the mixture is done, set it aside to cool.
The mixture needs to be below 80°F or so but not too cold that it becomes clumpy.
Next, whip the cream. You will want to whip it until you get stiff peaks. That’s the stage right before it turns to butter. Be careful not to over whip it or it will turn into butter.
PRO TIP 1: Use a very cold bowl and cold heavy cream when whipping. This will help the cream whip faster.
Once whipped and the berry mixture has cooled, pour the berry mixture into the cream.
PRO TIP 2: Use HEAVY whipping cream in this recipe. Heavy whipping cream has a higher fat content compared to regular whipping cream. The higher fat content helps you get a stiffer whip and gives this mousse more volume (it will be more stable).

Finish the Mousse:
Carefully fold the cream and berry mixture together. The cream mixture will turn a beautiful pink color. The berry mixture will begin to thicken as it cools but it should still easily fold into the thick whipped cream.

As the mousse cools, the gelatin will stabilize the mixture. It doesn’t happen instantly but will, eventually, as it chills in the fridge.
WHAT SHOULD I DO NOW THAT THE MOUSSE IS MADE?
You have a couple of options.
Serve it by its self:
If you are serving this mousse by its self, you can let it set(chill in the bowl) then pipe it into your serving dishes after it’s set or you can pipe or pour the mixture into your serving dishes before it sets.
Putting the mixture into the final serving dishes before it sets will give this mousse a more elegant, clean look. Piping it later, you will see air bubbles on the surface. It will still taste amazing, it just doesn’t look as pretty.
I like to pour the mixture right into my serving dishes before it sets because it gives this raspberry mousse such a smooth look.
PRO TIP 3: If piping into serving dishes LATER, only let the raspberry mousse chill for about 30 minutes. This will give the mousse time to become more firm but not fully set. This will give you a more smooth finish after piping. If piping IMMEDIATELY into serving dishes, let the raspberry mousse chill for at least an hour before serving. This will give the mousse time to fully set.

Make Raspberry Eclairs:
I’ve made these amazing raspberry eclairs with this raspberry mousse as the filling. They are delicious!
You can find the full printable recipe for my raspberry eclairs HERE.

Use it as frosting or filling:
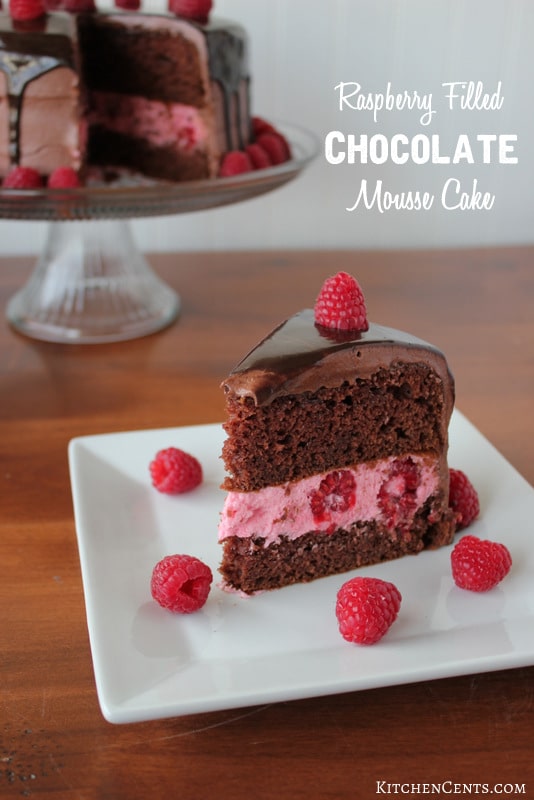
This mousse is great as a frosting or filling. We love it in this Chocolate mousse Cake filled with raspberries.
Man, I’m so excited for you to try this. It’s so good!
This easy raspberry mousse is smooth and creamy. Even when I use frozen raspberries, this raspberry mousse comes out tasting like it was made from fresh, perfectly sweet raspberries. It’s seriously fantastic! It will make this an occasion that much more special.
WHO WOULD YOU SHARE THIS WITH?


Easy Raspberry Mousse
Ingredients
- 12 oz fresh or frozen raspberries
- 2/3 cup sugar
- 1/4 cup water
- 1 1/2 cups heavy whipping cream make sure it’s really cold
- 1 pk unflavored gelatin (or 2 1/4 tsp) + 1/4 cup water to soften
Equipment
Method
- Stir gelatin into 1/4 cup cold water to soften. Set aside.
- In a small saucepan, add raspberries, sugar and 1/4 cup water. Heat until berries soften and being to break down. Puree in blender.
- Remove seeds using a strainer if desired. Put back into saucepan. Add softened gelatin. Bring to a boil. Boil for 1 minute, stirring constantly. Remove from heat. Cool to room temp (between 70-80 degrees F.).
- In a large bowl, whip cream to stiff peaks. This is the stage right before cream turns to butter. Be careful not to over whip.
- Once berry mixture is cooled adequately, carefully fold into cream. Pour into serving dishes or chill and pipe into serving dishes.
- Chill for 4-24 hours before serving.
Nutrition
Notes
Tried this recipe?
Let us know how it was!*This post contains affiliate links. In order to support this blog and continue providing free content, I may receive a commission from purchases you make through the links in this post. This comes at no cost to you. It just helps me keep the delicious recipes coming. ?
OP: 1.29.18 Updated: 1.5.20
Hi Rachel and thanks for the easy raspberry mousse and buttercream recipes. I now used both – buttercream as a filling for a cake I made, and mousse to serve alone. One question on the mousse – it was runnier than I expected. Where could I have got wrong? I followed instructions and cooled for several hours before serving. I’m thinking about using the mousse as a fill for the cake next time, but need to solve the consistency issue first. Thanks much!!
Did the mixture become very runny after you added the raspberry gelatin mixture? If so, my guess would be that the mixture was a bit too warm OR the whipped cream wasn’t as whipped as it needed to be.
Timing when to add the gelatin mixture is the hardest part of this recipe in my opinion. If added too early (when the mixture is slightly to warm) the warm gelatin mixture will pop the air bubbles that have been whipped into the cream. This will affect the structure of the mousse. If added to late (when the gelatin has begun to set) it can create lumps of gelatin and ruin the smoothness of the finished mousse.
If the whipped cream has not been fully aerated (whipped to stiff peaks but not butter) it may be too loose, to begin with. If the gelatin is too warm and causes the whipped cream to deflate, it will be too warm to re-whip after adding. I wonder if you could re-whip it after it has chilled for several hours (I’ve never tried this).
These two things are the first things I’d try. First, make sure your heavy whipping cream is whipped to stiff peaks (but not butter) then make sure the gelatin mixture is adequately cooled before adding but not going chunky. The gelatin should not feel warm to the touch but should also not be chunky.
I hope this helps!
Hi, I was wondering how many gelatin sheets I should use in place of the gelatin power? Thanks for sharing.
Hi Kim! One envelope of Knox gelatin (about 1 tablespoon) is equal to about 4 sheets. Hope this helps.
Hi does the gelatin have to be pink or can you add coloring?
The gelatin will be clear. The raspberries will make it turn red. When the raspberry gelatin mixture is mixed with the whipped cream it will turn pink. You could add coloring but there’s no need to in this recipe.
Hi, Can I make strawberry mousse cups with this recipe? Thanks
Hi Maria! We love strawberry mousse too but for this recipe I would stick with raspberries. I’ve tried this recipe with strawberries and the flavor is blah… not good. Because the berries are cooked, the fresh strawberry flavor is lost. Save yourself the time and try this easy strawberry mousse recipe instead–> https://kitchencents.com/easy-strawberry-mousse/
This was such an easy recipe. I put it in to go cups then put whipped cream on top, topped it with fresh raspberries then grated dark chocolate on top. Such a refreshing dessert to make. Thank you so much for the recipe!
Awe! Thanks, Dunia. I’m glad you like the recipe. It’s one of my favorites for sure. We love it by itself or on cake or cupcakes.
substituted Blackberries for Raspberries and Stevia for the sugar and it came out very good-a big hit with my diabetic friends with the reduced sugar. There are several websites that convert the amount of sugar needed to stevia or any other artificial sweetener (they even make the conversion into how many little packets of sweeteners since many of us don’t have them on hand in cannisters like we do sugar.
So happy to hear you were able to make the substitutions that fit your needs. Sounds delicious!
Could you use raspberry jello instead of gelatin
I’ve never tried it and I believe it will make the raspberry mousse too sweet. If you try it I’d love to hear about your experience.
The Best Raspberry mousse ❤️
It really is! Thanks for sharing 🙂
Rachel, I just have to stop by and say that this is my absolute FAVORITE raspberry mousse recipe in the world. Every time I make it for a customer I have to double the batch so I can save half for myself to inevitably eat in one sitting with a spoon on my couch watching Food Network. I’ve used it alone for party desserts, I’ve filled cakes and cupcakes with it, no matter how I use it I get rave reviews. Thanks for such a wonderful recipe! – Ashley
Your sweet comment made my day! Thank you! It’s one of my favorite mousses. Have a great day!
Hi can this mousse be frozen? Or does it ruin the texture? I really would like to make it for a party in advance .. but need to make it about 10 days ahead of time ..
I’ve never froze it by itself. I have frozen these raspberry eclairs –> https://kitchencents.com/raspberry-eclairs/ which uses this recipe as the filling and they come out great if left to come to room tempurature on their own (no microwave or oven). I leave them on the counter or let them thaw in the fridge. I would think it would be the same for this mousse. If you try it, I’d love to hear about your experience! Thanks for stopping by.
I was hoping to make this for a party but one of my friends can’t eat dairy, do you think it would still work if I substituted the heavy cream for coconut cream?
I’m not sure. I would think that would be fine but I’ve never tried that substitution. If you try it I’d love to hear about your experience! Good luck!
How much does the raspberry mixture make? Like in cups?
This recipe yields about 3 1/2 cups. Hope this helps.
Hi, i have a few questions about the gelatin. Is the gelatin unflavored? And how much do you put in because the measurements are a little confusing.
Hi Jenna! Yes, the gelatin is unflavored. If you scroll to the bottom of the post you will find the full printable recipe. On there it shows all the exact quantities you’ll need including the 1 pack or 2 1/4 teaspoons unflavored gelatin. Thanks for stopping by. I hope this helps.
Thanks this does help. Im making this for thanksgiving so i hope it’s great.
Hi don’t suppose u could give me The ingredients in metric please ? Thank you
Hi Lorraine!
To the best of my knowledge here’s the conversion:
340 g fresh or frozen raspberries
130 g granulated sugar
30 mL water
350 mL heavy cream
7-8 g unflavored gelatin (plus 60 mL cold water)
Hope this helps. Thanks for stopping by.
When publishing a recipe don’t you think it would be a good idea to give the quantities of the ingredients. I think that is pretty basic, don’t you? I gave this recipe a miss and picked another site which does give quantities
Hi Jennifer! I’m sorry it was a miss for you. It’s a delicious recipe! I’m glad you took the time to call me out on this. I would be incredibly stupid to think that the thousands of readers that come for my recipes wouldn’t want the actual full printable recipe, right? If you had read the post you would have found the full printable recipe using one of the golden buttons I’ve created and placed throughout this post or with the link toward the top of the post (“If you’d like to head right over to the printable recipe, you can click HERE or any of the big “Click for Recipe” buttons through this post.”). Clearly, you missed all of them, they would have taken you right to the recipe –> https://kitchencents.com/easy-raspberry-mousse/2/
So sorry you missed ALL of them. Better luck next time.
I wish there was a like button for this ?
Awe! Thanks so much! Your comment is definitely better than a “like!” Happy Holidays!
I was literally JUST talking with my besties about how I couldn’t have a baking blog because I just don’t have the patience to deal with dumb*** comments, and then 2 minutes later I came across this. I am DYING laughing and 1000% support this response ?
Thanks, Kelsey! Blog comments are like a nice slice of banana nut bread, it’s delicious and every once in a while you get a big nut. Have an awesome day!
You’d also have to be pretty stupid to shove so many ads on your page that it becomes borderline unusable. I have to “click for full recipe”, lag my way down past the hundred ads you’ve got, then I have to click again to “continue to content”?? Which is a button so close beside an ad you’re almost certainly breaking TOS, by the way – it’s a strategy used by people hoping users will accidentally click ads, and it’s scummy.
Then you get snarky, icing on the cake.
Greedy.
I’d fix these buttons which sit right beside ads, by the way. Gogle doesn’t like those and they’ll ban you for life if they think you’re being intentionally deceptive.
Hi Flanitia. I have sat on this comment trying to decide if I should give you my time or not. Are you a food blogger? If you were you would understand the work I do is extremely time consuming. I test each of my recipes multiple times. Shoot photos, sometimes video, edit, share across my social media and write a blog post sharing tips and maybe why I feel the recipe is worth sharing. These recipes come to you beautifully curated and tested, at no cost. To help support my family in the time I spend bringing these free recipes to you I display ads on my site so I don’t have to charge for my recipes and time it takes to develop and host them on the internet. I have added a convenient “jump to recipe” button right at the top of my posts so the recipe card is easy to find and access. I’m glad you found that. Also, you are not required to click the “continue to content” button to reach the recipe, you just scroll right below and would find the printable recipe card. If you’d like to skip the ads feel free to hit up your local book store and buy a cookbook. I may get a little snarky but that usually only happens when I have someone wanting my time for free. Have a great day.
You don’t owe flannita anything. Keep doing you and forget downers like this person. Their not worth your time.
The “snark,” as you call it, is warranted, as the original commenter (and commenters like you) are so woefully ignorant by choice, that it truly baffles the mind. I can’t imagine how many overt missteps one would have to make in order to reach the conclusions you and the original commenter reached.
Keep doing what you’re doing, Rachel! We support you and love your recipes (along with the insanely easy-to-find buttons that enable you to skip right to the recipe). Your responses were perfect for the absurdity of these two comments.
Can I substitute strawberries for raspberries. I really like strawberries better?
—
Hi Tammy! I wish you could in this recipe but unfortunately, it doesn’t taste very good. I’ve tried several times. When the strawberries are cooked it changes the flavor. Stay tuned… I will be sharing an easy strawberry mousse recipe soon. Hopefully next week 🙂
How far in advance can I make this recipe? Thanks!
Hi Charis! I’d say you’re probably safe to make this up to 2 days before. Store covered in the fridge until you’re ready to serve. We’ve enjoyed this up to 4 days after I made it. Usually, it gets eaten within a day but we had a dish hiding behind a gallon of milk and when it was found post 4 days, it was gobbled up in a flash. To play it safe I’d still stick with no more than about 48 hours becuase it’s made with fresh fruit. Hope this helps. 🙂
this is just perfect for a little girl tea party! and tastes so good!!!
Hi, Junipper! My girls love this raspberry mousse and it’s an added bonus with how easy it is to make. Thanks for stopping by!
this is just perfect for a little girl tea party! and tastes so good!!!
If I was using this as a “filling” in the middle of a chocolate cake do you think I should half the recipe, or what should I do so I don’t make too much? ( it is a 2-layer cake)
Hi Brooklyn! Yes, you can use this as a filling for a cake. If you don’t want extra you can halve the recipe or you can make a full batch, enjoy the leftover or use on the top of the cake (as a decorative touch). We love this raspberry mousse in this raspberry filled chocolate mousse cake (link at the end of this comment)! I would let the raspberry mousse chill and set for 30-min or so before using it as a filling though. This will give it time to stabilize. https://kitchencents.com/raspberry-filled-chocolate-mousse-cake-with-chocolate-ganache/